
在本文中,我将演示如何仅使用Angular Signals和一个小函数来管理应用程序的状态。
不仅仅是“与主题一起服务”
让我们从解释为什么在服务中使用一堆BehaviorSubject对象不足以管理异步事件引起的状态修改开始。
在下面的代码中,我们有一个方法saveItems(),它将调用API服务,以异步更新项列表:
saveItems(items: Item[]) {
  this.apiService.saveItems(items).pipe(
    takeUntilDestroyed(this.destroyRef)
  ).subscribe((items) => this.items$.next(items));
}
每次我们调用这种方法,都是在冒险。
例如:假设我们有两个请求,A和B。
请求A在0s 0ms开始,请求B在0s 250ms开始。然而,由于某些问题,API在500ms后对A做出响应,在150ms后对B做出响应。
结果,a在0s 500ms时完成,B在0s 400ms时完成。
这可能会导致保存错误的项目集。
它也适用于GET请求——有时,对搜索请求应用什么过滤器非常重要。
我们可以添加一些支票,如下所示:
saveItems(items: Item[]) {
  if (this.isSaving) {
    return;
  }
  this.isSaving = true;
  this.apiService.saveItems(items).pipe(
    finalize(() => this.isSaving = false),
    takeUntilDestroyed(this.destroyRef)
  ).subscribe((items) => this.items$.next(items));
}
但是,正确的项目集将根本没有机会保存。
这就是为什么我们的Store需要效果。
使用NgRx ComponentStore,我们可以这样写:
 readonly saveItems = this.effect<Item[]>(_ => _.pipe(
   concatMap((items) => this.apiService.saveItems(items)),
   tapResponse(
     (items)=> this.items$.next(items),
     (err) => this.notify.error(err)
   )
));
在这里,您可以确保请求将一个接一个地执行,无论每个请求运行多长时间。
在这里,您可以很容易地为请求排队选择一种策略:switchMap()、concatMap(),exhautMap()或mergeMap()。
基于信号的存储
什么是应用程序状态?应用程序状态是定义应用程序外观和行为的变量集合。
应用程序总是有一些状态,而“Angular 信号”总是有一个值。这是一个完美的匹配,所以让我们使用信号来保持应用程序和组件的状态。
class App {
   $users = signal<User[]>([]);
   $loadingUsers = signal<boolean>(false);
   $darkMode = signal<boolean|undefined>(undefined);
}
这是一个简单的概念,但有一个问题:任何人都可以写信给$loadingUsers。让我们将状态设为只读,以避免全局可写变量可能带来的无限微调器和其他错误:
class App {
   private readonly state = {
     $users: signal<User[]>([]),
     $loadingUsers: signal<boolean>(false),
     $darkMode: signal<boolean|undefined>(undefined),
   } as const;

   readonly $users = this.state.$users.asReadonly();
   readonly $loadingUsers = this.state.$loadingUsers.asReadonly();
   readonly $darkMode = this.state.$darkMode.asReadonly();

   setDarkMode(dark: boolean) {
     this.state.$darkMode.set(!!dark);
   }
}
是的,我们写了更多的行;否则,我们将不得不使用getter和setter,这甚至是更多的行。不,我们不能让它们都是可写的,并添加一些评论“不要写!!”😉
在这个存储中,我们的只读信号(包括使用computed()创建的信号)是状态和选择器的替代品。
剩下的只有:我们需要效果,改变我们的状态。
Angular Signals中有一个名为effect()的函数,但它只对信号的变化做出反应,通常我们应该在向API发出一些请求后修改状态,或者作为对某些异步发出的事件的反应。虽然我们可以使用toSignal()创建额外的字段,然后在Angular的effect()中观察这些信号,但它仍然不能像我们想要的那样对异步代码进行控制(没有switchMap()、没有concatMap(),没有debounceTime()和许多其他东西)。
但是,让我们使用一个著名的、经过充分测试的函数,使用一个强大的API:ComponentStore.effect(),并使其独立!
createEffect()
使用此链接,您可以获得修改后的函数的代码。它很短,但如果你不能理解它是如何在引擎盖下工作的,请不要担心(这需要一些时间):你可以在这里阅读关于如何使用原始effect()方法的文档:NgRx Docs,并以同样的方式使用createEffect()。
如果不键入注释,它非常小:
function createEffect(generator) {
  const destroyRef = inject(DestroyRef);
  const origin$ = new Subject();
  generator(origin$).pipe(
    retry(),
    takeUntilDestroyed(destroyRef)
  ).subscribe();

  return ((observableOrValue) => {
    const observable$ = isObservable(observableOrValue)
      ? observableOrValue.pipe(retry())
      : of(observableOrValue);
    return observable$.pipe(takeUntilDestroyed(destroyRef)).subscribe((value) => {
      origin$.next(value);
    });
  });
}
它被命名为createEffect(),以不干扰Angular的effect()函数。
修改:
createEffect()is a standalone function. Under the hood, it subscribes to an observable, and because of thatcreateEffect()can only be called in an injection context. That’s exactly how we were using the originaleffect()method;createEffect()function will resubscribe on errors, which means that it will not break if you forget to addcatchError()to your API request.
当然,您可以随意添加您的修改:)
把这个函数放在项目的某个地方,现在就可以管理应用程序状态,而不需要任何额外的库:Angular Signals+createEffect()。
Store类型
有三种类型的Store:
- 全局存储(应用程序级)--应用程序中的每个组件和服务都可以访问;
- 功能存储(“功能”级别)——某些特定功能的后代可以访问;
- 本地存储(也称为“组件存储”)--不共享,每个组件都会创建一个新实例,当组件被销毁时,该实例将被销毁。
我编写了一个示例应用程序,向您展示如何使用Angular Signals和createEffect()实现每种类型的存储。我将使用该应用程序中的存储和组件(不带模板),让您看到本文中的代码示例。你可以在这里找到这个应用程序的全部代码:GitHub链接。
Global Store
@Injectable({ providedIn: 'root' })
export class AppStore {
  private readonly state = {
    $planes: signal<Item[]>([]),
    $ships: signal<Item[]>([]),
    $loadingPlanes: signal<boolean>(false),
    $loadingShips: signal<boolean>(false),
  } as const;

  public readonly $planes = this.state.$planes.asReadonly();
  public readonly $ships = this.state.$ships.asReadonly();
  public readonly $loadingPlanes = this.state.$loadingPlanes.asReadonly();
  public readonly $loadingShips = this.state.$loadingShips.asReadonly();
  public readonly $loading = computed(() => this.$loadingPlanes() || this.$loadingShips());

  constructor() {
    this.generateAll();
  }

  generateAll() {
    this.generatePlanes();
    this.generateShips();
  }

  private generatePlanes = createEffect(_ => _.pipe(
    concatMap(() => {
      this.state.$loadingPlanes.set(true);
      return timer(3000).pipe(
        finalize(() => this.state.$loadingPlanes.set(false)),
        tap(() => this.state.$planes.set(getRandomItems()))
      )
    })
  ));

  private generateShips = createEffect(_ => _.pipe(
    exhaustMap(() => {
      this.state.$loadingShips.set(true);
      return timer(3000).pipe(
        finalize(() => this.state.$loadingShips.set(false)),
        tap(() => this.state.$ships.set(getRandomItems()))
      )
    })
  ));
}
要创建全局存储,请添加以下装饰器:
@Injectable({ providedIn: ‘root’ })
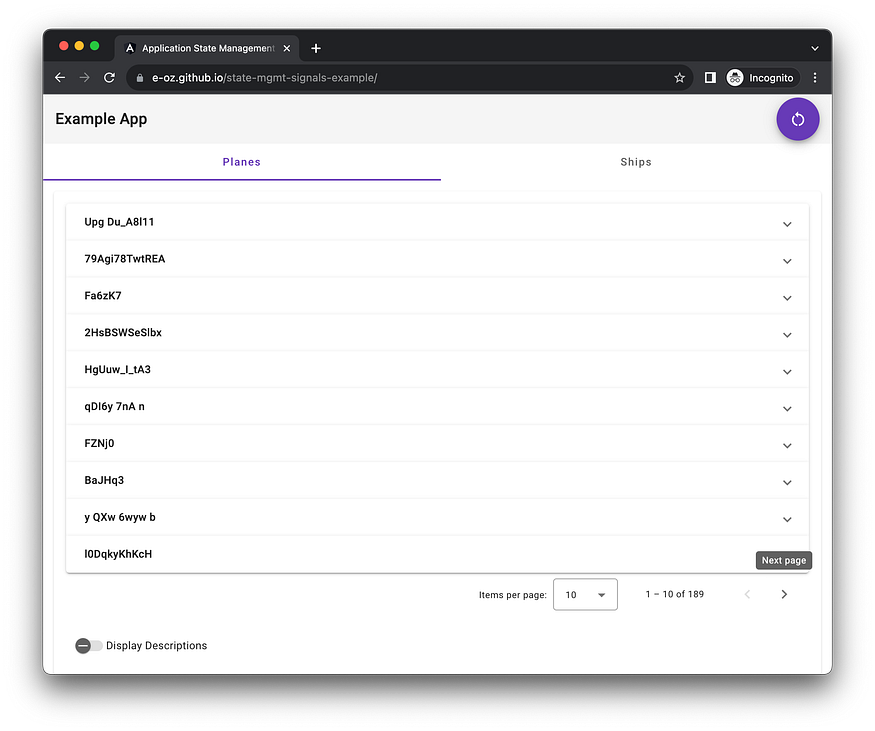
在这里,你可以看到,每次你点击紫色的大按钮“Reload”,“飞机”和“飞船”这两个列表都会被重新加载。不同之处在于,“平面”将被连续加载,与您单击按钮的次数一样多。“Ships”将只加载一次,所有连续的点击都将被忽略,直到上一次请求完成。
字段$loading被称为“派生的”——它的值是使用compute()从其他信号的值中创建的。它是角信号中最强大的部分。与基于可观察的存储中的派生选择器相比,computed()具有一些优势:
- 动态依赖项跟踪:在上面的代码中,当$loadingPlanes()返回true时,$loadingShips()将从依赖项列表中删除。对于非平凡的派生字段,它可能会节省内存;
- 无毛刺,无脱落;
- 懒惰的计算:派生值不会在它所依赖的信号的每次变化时重新计算,而是只有在读取该值时(或者如果生成的信号在effect()函数内部或在模板中使用)。
还有一个缺点:你无法控制依赖关系,它们都是自动跟踪的。
Feature Store
@Injectable()
export class PlanesStore {
  private readonly appStore = inject(AppStore);
  private readonly state = {
    $page: signal<number>(0),
    $pageSize: signal<number>(10),
    $displayDescriptions: signal<boolean>(false),
  } as const;

  public readonly $items = this.appStore.$planes;
  public readonly $loading = this.appStore.$loadingPlanes;
  public readonly $page = this.state.$page.asReadonly();
  public readonly $pageSize = this.state.$pageSize.asReadonly();
  public readonly $displayDescriptions = this.state.$displayDescriptions.asReadonly();

  public readonly paginated = createEffect<PageEvent>(_ => _.pipe(
    debounceTime(200),
    tap((event) => {
      this.state.$page.set(event.pageIndex);
      this.state.$pageSize.set(event.pageSize);
    })
  ));

  setDisplayDescriptions(display: boolean) {
    this.state.$displayDescriptions.set(display);
  }
}
该功能的根组件(或路由)应“提供”此存储:
@Component({
  // ...
  providers: [
    PlanesStore
  ]
})
export class PlanesComponent { ... }
不要将此存储添加到子代组件的提供程序中,否则,它们将创建自己的本地功能存储实例,这将导致令人不快的错误。
Local Store
@Injectable()
export class ItemsListStore {
  public readonly $allItems = signal<Item[]>([]);

  public readonly $page = signal<number>(0);

  public readonly $pageSize = signal<number>(10);

  public readonly $items: Signal<Item[]> = computed(() => {
    const pageSize = this.$pageSize();
    const offset = this.$page() * pageSize;
    return this.$allItems().slice(offset, offset + pageSize);
  });

  public readonly $total: Signal<number> = computed(() => this.$allItems().length);

  public readonly $selectedItem = signal<Item | undefined>(undefined);

  public readonly setSelected = createEffect<{
    item: Item,
    selected: boolean
  }>(_ => _.pipe(
    tap(({ item, selected }) => {
      if (selected) {
        this.$selectedItem.set(item);
      } else {
        if (this.$selectedItem() === item) {
          this.$selectedItem.set(undefined);
        }
      }
    })
  ));
}
与功能存储非常相似,组件应该为自己提供此存储:
@Component({
  selector: 'items-list',
  // ...
  providers: [
    ItemsListStore
  ]
})
export class ItemsListComponent { ... }
Component as a Store
如果我们的组件没有那么大,我们确信它不会那么大,而且我们只是不想为这个小组件创建一个存储区,该怎么办?
我有一个组件的例子,是这样写的:
@Component({
  selector: 'list-progress',
  // ...
})
export class ListProgressComponent {
  protected readonly $total = signal<number>(0);
  protected readonly $page = signal<number>(0);
  protected readonly $pageSize = signal<number>(10);

  protected readonly $progress: Signal<number> = computed(() => {
    if (this.$pageSize() < 1 && this.$total() < 1) {
      return 0;
    }
    return 100 * (this.$page() / (this.$total() / this.$pageSize()));
  });


  @Input({ required: true })
  set total(total: number) {
    this.$total.set(total);
  }

  @Input() set page(page: number) {
    this.$page.set(page);
  }

  @Input() set pageSize(pageSize: number) {
    this.$pageSize.set(pageSize);
  }

  @Input() disabled: boolean = false;
}
在Angular的版本17中,将引入input()函数来创建作为信号的输入,从而使此代码变得更短。
此示例应用程序部署在此处: GitHub Pages link.
您可以使用它来查看不同列表的状态是如何独立的,功能状态如何在功能的组件之间共享,以及所有组件如何使用应用程序全局状态中的列表。
在代码中,您可以找到对事件的反应、异步状态修改的排队、派生(计算)状态字段和其他详细信息的示例。
我知道我们可以改进代码,让事情变得更好——但这不是这个示例应用程序的重点。这里的所有代码只有一个目的:说明本文并解释事情是如何工作的。
我已经演示了如何在没有第三方库的情况下管理Angular应用程序状态,只使用Angular Signals和一个附加函数。
感谢您的阅读!
🅰️ More about Angular Signals 🚦
- 登录 发表评论